Make your own centerpiece this Thanksgiving!

Have you always wanted to create your own cut flower arrangement but not sure exactly how to do it?? Take a look at this article that breaks it down so even you can create that Thanksgiving centerpiece that you’ve always wanted!!!

http://www.houzz.com/ideabooks/4756623/list/arrange-a-gift-floral-bouquet-like-a-pro

Ideas for your Dream Kitchen

Give your kitchen a more refined look by changing just a detail or two. Here are the top 10 Upgrades that can you give you your dream kitchen.

1. Roman shades
2. Topiary
3. Pendant lighting
4. A rich cabinet color
5. Wall paint
6. Upscale counter stools
7. Glass cabinet fronts
8. A chic rug
9. Branches in a tall vase
10. Decorative details

Check out the entire article with pictures at Houzz.com at the link below:

http://www.houzz.com/ideabooks/29346530/list/10-upgrades-for-a-touch-of-kitchen-elegance See More

Beat the summer heat!

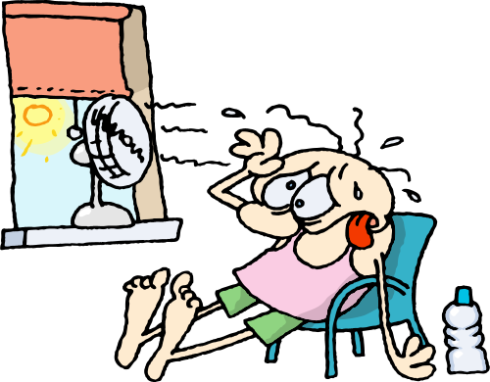
If you’ve looked at the forecast for later this week, you may have noticed that the temperature is going to rise considerably. For some, it just means an opportunity to open up the pool if you haven’t already, or to crank on the AC and relax on the couch. For others who aren’t as fortunate, it’s a time to combat heat stress and find ways to keep cool.  Follow these tips to ensure a safe summer ahead: 


Keep the shades drawn during the day

Also, it may seem counterintuitive, but opening the windows will often make your home warmer, not cooler. Open your windows at night if the air outside is cooler than inside, and close them, along with blinds and shades, before the sun hits your house in the morning. When sunlight streams through the windows, it creates a miniature greenhouse effect in your home. You may also put houseplants – particularly larger potted trees – in front of sunny windows to absorb some of the sun’s energy.

Get rid of incandescent lights

 Not only do those suckers use more energy, they generate a lot more heat than CFL or LED light bulbs.

While modern lightning, like compact fluorescents and LEDs, are more efficient, incandescent light bulbs can produce as much heat as they do light. Energy Star-rated light bulbs produce 75% less heat, so consider that when replacing bulbs. It’s always a good idea to shut off lights anyway to save energy, and it especially makes a big difference on hot sunny summer days. The same goes for many electronics (like computer and laptops, TV’s, etc), so consider unplugging any device that isn’t needed (even in standby mode, many electronics remain hot).

Make sure your ceiling fans are running counter clockwise

Ceiling fans can create a pleasant breeze to cool a room significantly. Be sure that you have the fan running in the right direction since ceiling fans can also be used in winter to create an updraft: in the summer, you should feel the breeze blowing down. Most modern fans will have a little switch on the side to reverse their direction. You want the fan to go clockwise in winter to push warm air down and reverse it in the summer to circulate cool air.

Stand-alone fans placed directly in front of you, it’s no surprise, help keep you cool. Add in a spritz bottle and you can dramatically change your temperature; as the water evaporates off your skin, your body sheds heat.

A Do-it-yourself wind tunnel is another option; if there’s a cool breeze, particularly at night, set one fan facing in on the side of your home facing the wind, and another facing out on the opposite end of the house. You’ll maximize the cooling power of a natural breeze. Pretty awesome idea, right?


Dress appropriately

Loose-fitting, light clothing goes a long way toward keeping you cool. It’s time to bust out those cotton shorts and tank tops. It’s important to wear fabrics that breathe (right down to your underwear, too!).

Grab a towel

 A towel soaked in cold water is a great way to cool down. Apply it to your neck, wrists, and forehead for some relief during the hottest part of the day. Fun fact: If you have a water bottle with warm water and want to make it cool, try putting it into a sock that’s been soaked in water, and hang it outside in the heat. The water evaporates from the sock, leaving the water bottle inside of it cooler by as much as 30 degrees.


Avoid the stove and oven

Both of these will add unnecessary heat to the house. That’s a no-brainer. Instead, fire up that outdoor grill or whip up a salad or sandwich. Your rice or slow cookers are other alternatives to heating up the house with the stove or oven if you’re enticed to have something hot and not from the barbie.


Learn from your pets

Fido and Fluffy are geniuses. How does your cat cope with the hottest part of the day? She snoozes! If you can squeeze in an afternoon nap, go for it. Who’s really going to argue with that (aside from maybe your boss if you’re at work…)?

Plant a tree… or three!

Your house gets hot because the sun beats down on it relentless on hot summer days. Let nature help reduce your energy bills by planting deciduous trees on the east and west sides of your home ; in the summer, their broad leaves will shade your house, while in the winter, bare branches won’t stop the sun’s warmth from reaching your walls. Also consider planting trees or shrubs to shade high-heat areas – air conditioning units that emit heat, for instance, and driveways and walkways that absorb it.


Drink LOTS of water

Again, that’s a no-brainer. When temperatures soar, you risk heat-related injuries, even if you’re doing very little activity. Staying well hydrated will help keep your body from over-heating, especially if you’re sweating.  The moment you stop sweating is an indication that you’re not drinking nearly enough. And as much as you probably don’t want to hear it, stay away from the alcohol. Booze will just dehydrate you further, as much as a margarita sounds delish!
Image


What’s the Buzz?

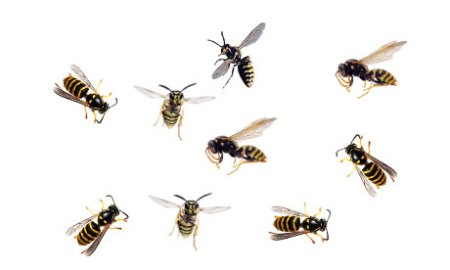
Everyone’s enjoying this beautiful weather, right? But if you’re allergic to bees or wasps, like many of us are, spring just means a time to become more vigilant of your surroundings. But did you know that not all wasps sting? It’s probably a good idea to know which do and don’t, especially when they wind up in your home, as they often do. Believe it or not, you’ve probably been living with these insects since last fall… they likely migrated into your home through cracks and openings, and found a nice little niche to hibernate in over the winter. Usually around this time of the year, if you see a wasp inside of your home, it’s a paper wasp, in particular, an overwintered queen, which does sting. And since they’re attracted to light, you’ll most likely find them heading towards your windows.

So how do I get rid of them if they’re in my home? The easiest way to dispose of them without harm to you is with a vacuum cleaner, broom or fly swatter.  

Prevention is your best measure to control wasps inside your home. Stop them before they can get in! Follow these steps for best results:

* Locate the nest

The presence of a single or a group of wasps is a clear indication that a colony is nearby. It’s also a sign that wasp infestation is well underway. You may even have an infestation already. Track down their nests by following their flight trail. Be very careful to avoid catching their attention and start a major swarm attack.

* Inspect the nest

Conduct a thorough inspection after identifying the nest, but don’t get too close (for your own safety, of course!). Since most nests are located in enclosed areas, it is necessary to identify where these wasps enter and exit their nest. Be extremely careful to avoid disturbing the colony, otherwise you’re going to have a really bad day. If disturbing their nest is unavoidable, keep a pesticide spray handy to combat possible attack. It’s best to do this with a buddy in case a mishap occurs.

* Choose your poison

Do not attempt to remove the wasp nest without preparing the pesticide you choose first. Choose the best way to administer the pesticide. If the nest’s location is elevated, such as up on a roof, use a spray type of pesticide with a wand. On the other hand, using a non-projectile type for underground wasp nests is your best bet.

* Choose the best time to remove the nest

Removing the nest at night may be the best time to do the job. Wait two to three days after spraying. These creatures are not nocturnal, so they rest at night. However, do not use your flashlight directly into the nest so they don’t wake up. Wasps are also very aggressive during this time of the year, just in time for their mating season; therefore, be very careful. * Gear up.

Cover your body from the neck down. Gear up by wearing a turtle neck top with long sleeves, a thick pair of jeans and thick gloves. Wear a face mask to shield your face from these harmful stingers. As I mentioned before, find a buddy to lend an extra hand because in most cases, you may need it. Wasp nest removal is a tricky and dangerous task that needs careful and precise administration. Arming yourself with pesticides is necessary; however, wearing the proper suit is equally essential.

* Remove the nest

Carefully remove the wasp nest from its location by using a putty knife or scraper. Then, hose down the location with a high pressure hose. Make sure all remnants are gone and all wasps are dead, otherwise, they may rebuild their nest and your efforts will have been futile.

* Eradicate the wasps

Find the queen. Wasps are very similar with bees, ants and other colonizing insects. In the center of their colony, they are serving a queen. The queen lays the eggs in multitude. Since the queen is the heart and soul of the colony, the creature is usually at the center of the hub. A successful wasp nest removal is not complete unless you are able to find and eradicate the queen. Visit the former breeding location, armed with pesticide of course, even after the wasp nest removal, to ensure that there are no survivors and that all wasps have been totally eradicated. Dip the nest inside a bucket of water mixed with petroleum jelly. Doing so can drown the remaining survivors and the petroleum jelly would make their wings sticky so they could not fly away.

* Install preventive measures

Place wasp traps and repellant around the house. However, you may not be keen on using pesticides or poison at home, especially if you have young children or pets. In that case, the best alternative is to use a large bucket filled with water. Water traps and kills wasps and thwarts any possibility of wasp colonization. You may want to consider using mosquito repellant rings in the buckets, however, otherwise you’ll open up a whole new can of worms when mosquitoes begin to hatch in the standing water.

Image

Spring is Here! Close the Windows!

If you’re like most folks, there’s no better feeling than opening up the windows for the first time in the spring to welcome that warm breeze into your home. For many, however, there are dire consequences. Not only can outdoor allergens come indoors, you also risk stirring up the already-indoor allergens such as dust mites, mold and pet dander which trigger allergy and asthma symptoms in millions of people. Carried in through the air, these allergens can be found on furniture, floors and other surfaces around the home. It’s nearly impossible for your house to be completely allergy-free, though cleaning on a regular basis can drastically reduce the number of allergens to which you’re exposed.

So what can you do? Try these steps:

  • Bop those dust bunnies! One of the best ways to control indoor allergens is by getting rid of dust. Why? Because DUST MITES thrive in dust. Dust mites are the biggest trigger of asthma and allergy symptoms inside the home. Be aware though that dusting can actually make things worse by kicking up allergen particles into the air. Your best bet is to use a damp cloth that will attract the dust rather than scatter it like those feather dusters do. You might also want to consider wearing a dust mask when cleaning if your allergies are particularly bad. Minimizing clutter in your home will also minimize the amount of dust that collect—keep that in mind.
  • Vacuum! And that doesn’t just mean when you have company. Vacuuming, especially in areas that accumulate dust, such as rugs, carpets and furniture, can help control allergens in your home. It’s best to use a vacuum with a HEPA filter, which traps small particles and prevents them from spreading into the air. As far as frequency goes, vacuum EVERYDAY! Just kidding, but you’re more than welcome to. Try to at least vacuum once or twice a week though for best results.
  • Wash your bed linen! But don’t just hang them out to dry. You should wash them in hot water and dry then in a hot dryer as well to kill dust mites. It’s also a good idea to encase pillows and mattresses in allergen-proof covers.
  • Go green! Did you know that a lot of those abrasive chemicals that kill 99.99% of germs can actually trigger your asthma or allergies? If you find this true, it might be a good idea to switch to green, environmentally-friendly cleaning products which have natural and plant-based ingredients. You could also save a buck or two by opening up your cabinets and making your own cleaners out of vinegar, baking soda and lemon.
  • Shave Fluffy! Well, maybe you don’t have to go through that extreme, but if you have furry friends at home, they might be triggering your allergies, sadly. The protein found in their saliva, urine and dander is a common allergy. But have no fear! Don’t go dropping Fido off at the shelter just yet. Control your symptoms by vacuuming frequently and washing your pet at least once a week. Other measures you could take include keeping them out of your bedroom and off of the furniture.
  • Prevent mold and mildew! If you read my previous blog, then you’d know that mold loves damp places such as the basement and bathroom. Unfortunately, mold spores can also float in the air like pollen and yes, trigger those nasty allergy symptoms. So what can you do to minimize this? Replace wallpaper with tile or paint that is mold/mildew-resistant. It’s also a good idea to run an exhaust fan while you shower, if your bathroom is equipped with one or crack a window open. If these aren’t options, or even if they are, towel-drying the shower after you bathe is always a good idea. It’s also a good idea to replace you shower curtain after a while if you start to see it building up with mold, usually at the bottom where you don’t look much.
  • Lastly, as tempting as it may be on a warm day, don’t hang your laundry outdoors unless you want to wear pollen. But hey, some folks look great in yellow!

Image

For more information, visit http://www.billmccormick.com

Tick Tock… tick TALK!

So it’s spring, right? You know what THAT means… the BUGS start marching their way back out, and with those bugs are TICKS. Just this past January, researchers discovered a new disease transmitted by the same deer tick that transmits Lyme Disease. Kind of scary, huh? There are ways to protect you and your family though, at least where you spend the most time, particularly this spring and summer.

As mentioned previously in a blog of mine, diatomaceous earth is a great resource for treating your yard for insects, especially ticks. It is a completely natural product that is both safe for your children and pets that works by scratching the exoskeletons of insects, which in turn allows their bodies to dehydrate, killing them.  

You can also take the traditional route by using toxic treatments such as DEET to control ticks. There are several products on the market which are deemed very effective such as Ortho’s Bug-B-Gon or Sevin’s Ready-To-Spray Bug Killer. Just make sure to apply exactly as directed and allow to dry completely (if liquid) before allowing your children or pets to play on the lawn again. If you live near a waterway, be extra careful as the runoff from the products can affect it.

The best way to PREVENT ticks in your yard, however, is to keep the grass trimmed! If you have tall grasses or weeds, cut them back. Ticks love to hide out in tall grasses, in particularly because MICE love to nest in tall grasses. Mice are the biggest hose of deer ticks and the main sources of Lyme.

Consider planting some naturally-repelling plants, too. Plants with strong odors are great for repelling ticks and other bugs. Geraniums, mint, citronella and garlic have properties that ticks will stay away from.

You could also make a patio or play area a tick-free zone by keeping shrubs and grass away from them. Surround them with a natural barrier such as rocks or wood chips. Make sure you’re vigilant about removing winter debris, however, since piles of leaves and twigs often become breeding grounds because they are moist and woody.

Lastly, I would like to mention the wonders of Tick Tubes. These are by far one of my favorite products on the market. They are biodegradable, cardboard tubes filled with insecticide-treated cotton balls. Like I mentioned before, mice are the biggest culprits for ticks carrying Lyme, especially if you having hiding spots for them in or around your yard. The mice collect the cotton balls to build their nests. Now, these cotton balls aren’t harmful to the mice but the pesticide within them DOES kill the ticks that feed off of them in the spring and fall. Pretty clever, huh? Of course, if you want to get rid of mice all together—well, good luck. They’re a tricky species, especially when it comes to trapping or baiting outdoors. For more information on these Tick Tubes, click here.

Image

Mole… Mole… wait, no–MOLD!

Now that it’s starting to get warmer outside, it’s time to put away the winter clothes and pull out the mop and broom. Spring is here and that means spring cleaning, woohoo! As nice as the final results might be, there are some precautions you should take. Sweeping and pulling things off of shelves can stir up dust, airborne dander (especially if you have pets), and mold spores. Moooooold, just what everyone wants to see, right? Don’t forget that many household chemicals need proper ventilation as well while you’re cleaning away.

For many people, spring cleaning could mean increasing allergy and asthma attacks or experiencing the side effects of exposure to toxic household cleaning products. To prevent problems from chemical exposure, make sure that there is adequate ventilation in the areas that you will be working. Wait until a nice warm day when you can open up all of the windows to allow fresh air into your home while you work. If you are treating mold or mildew in a bathroom, be especially sure to open doors and windows, and turn on the fan to ventilate the room if you have one. Leave the fan running for several hours, if possible. 

Wear a dust mask if you are going to be doing a lot of sweeping, especially if you are working in your cellar where there is a higher risk of stirring up mold spores. Stop working if you experience dizziness, headaches, or respiratory problems. If the problems persist or get worse, see a doctor as soon as you can. It probably isn’t a terribly life-threatening problem, but you won’t want it to get worse.

How to perform an Inspection for Mold Spores

As mentioned in a previous blog post of mine, you may also want to use spring cleaning as a time to perform routine maintenance for your home. Especially in mid-spring, when the pollen count is high, it is a good idea to check your HVAC filters to ensure you system is operating efficiently. Do a visual inspection around your home for signs of leaks or water damage (April is usually a good time since it’s almost always infamous for lots of spring time rain), and clean out gutters of leaves and debris and inspect around the foundation of the home for any sign of water intrusion.

As the temperatures climb, usually around Mid to late May or so, energy-efficient homes can become breeding grounds for mold spores and mildew. Homes are being build tighter now to reduce energy loss, but because of their efficiency, the quality of the indoor air may be compromised. According to the EPA, the air inside you home may be more than five times as polluted as the air outside. Scary thought, isn’t it?  Increasing the amount of fresh air inside the home will dilute any buildup of toxins from volatile organic compounds (VOCs), but bringing in hot and humid air can increase the amount of mold found inside the home. Investing in an air purifier or dehumidifier may be very beneficial.

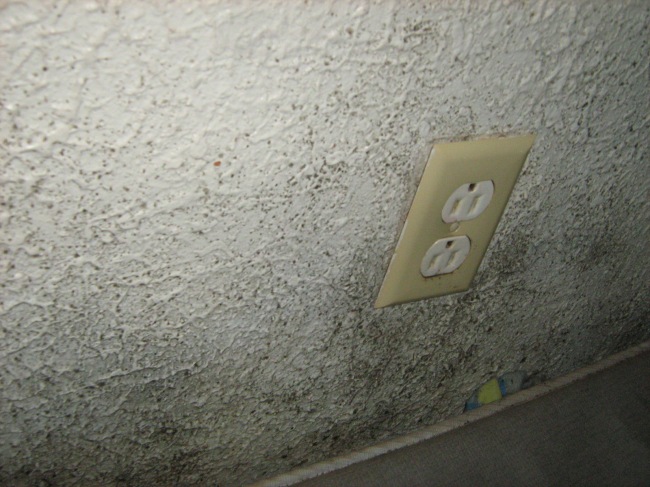
Signs of mold inside the home include a persistent musty odor (very distinctive “basement” smell), excessive dust or airborne dander and particles, and a gray or black coating on wood or wood-based materials such as drywall. Light brown spots on ceilings and walls can also indicate the presence of mold in the home. Other signs include water stains on walls, ceilings, or under carpet pads. If you have water stains on your ceiling, your roof may be leaking. Check out my blog on quick fixes for leaky rooftops!

How to Tackle the Mold

If your home has visible signs of mold, it is possible to clean it yourself if you take the correct precautions. According to the EPA, if the affected area is less than ten square feet, you may be able to clean it yourself. If you choose to clean it yourself, you will need to wear long rubber gloves and clothing that covers your arms and legs completely. Be sure to use a respirator-type dust mask, unless you enjoy inhaling noxious fumes that could potentially send you to the hospital. Cleaning mold can send potentially harmful mold spores into the air, so follow EPA recommended guidelines carefully to minimize your exposure. For complete guidelines on how to clean mold, call the EPA Indoor Air Quality Information Clearinghouse at (800) 438-4318, or go to: http://www.epa.gov/mold/mold_remediation.html

Too Much to Handle?

It’s okay! And it’s probably safer if you let a professional handle the job. If you decide to hire a contractor to clean the mold in your home, make sure to check his or her references first though. Ask for an exact plan that follows the EPA guidelines for mold remediation. Get more than one estimate before embarking on any mold related home repair. Also check for coupons! This time of the year, many companies promote their business with good deals that you can utilize.

How  Keep the Home Healthy!

Cleaning around the home and removing any mold that you find is a good start, but problems will recur if the home is not properly maintained. If the humidity levels in your home are rising above 45%, mold can, and will, reappear. Being that we’re in New England, this can happen often during the summer. Maybe not as bad as down south, but we all now how bad those hazy, hot and humid days in the summer can be. Mold colonies hiding behind walls can produce mycotoxins that migrate through cracks and even penetrate the drywall. These mycotoxins can affect your health if you are exposed to them for long periods of time. To dilute mycotoxins and other VOCs, the EPA recommends bringing in fresh air from outdoors. The American Society of Heating, Refrigeration and Air conditioning Engineers (ASHRAE) recommends exchanging the air in your home with outdoor air eight times a day. If you are considering purchasing a whole-house air system, be sure to ask about both filtration and ventilation. By filtering and exchanging the air and maintaining the proper level of humidity, you can create an environment that is optimal for your family’s health.

Image

Home Makeovers for UNDER $100

Whether you are updating your current room scheme or completely changing your mind about what you like, you can accomplish your decorating goal for under $100 with a little bit of research and some carefully laid plans.

Do you know what decorating style you like? What colors help you relax? What colors refresh you? Do you like straight lines or curved lines? Do you enjoy bright airy rooms or darker rooms with a lot of texture? The first thing to do is research some decorating styles. You can do this online in a search engine or by looking through magazines such as Better Homes and Gardens (http://www.bhg.com/) or even furniture stores.

Now that you have some things to consider, you are probably wondering how to pull everything together with that somewhat “measly” $100. The first thing you should do after deciding what look you want is to decorate around what you have. There are many things that can be done, replaced, or removed. Walk around your house or apartment and see what will work in your new room. Chances are you can pull a few things from a couple other rooms and all the rooms will benefit. If you have to go shopping, start at garage sales, charity stores and flea markets. You can even look online at classifieds such as craigslist. I’ve found several great finds there myself. Those are good places to find great deals on accessories like picture frames, candlesticks, and even old furniture that can be painted, stained or refinished. Don’t look at the way the furniture looks, look at the lines it has and of course, whether or not it’s in fairly good shape. If you can’t find anything in those places, try retailers such as Marshalls, Homegoods or TJMaxx, especially in their clearance sections. They always have some great deals on the most unique treasures!

Before you go shopping though, consider this: Take everything out in the room. If it’s a living room or family room, perhaps just rearranging the furniture can make it more pleasing to your eye. If not, do you have items in storage that you just didn’t have enough room for? What about taking them out now and putting them on display? Show some love for the old, hidden treasures! Try switching out area rugs or throw rugs or just replacing them in general. Switch out your lamps, book shelves, and picture frames on the walls.

In the bedroom, get rid of clutter. Have a treadmill that’s being used more as a coathanger? Get rid of it. You can sell it or maybe put it downstairs in front of the TV where you can motivate yourself a little more to exercise. How about a new comforter set? They seem to always be on sale and if you know how to shop right, you can find them at inexpensive prices, especially in clearance sections, or at discount stores such as Ann & Hope or Big Lots. If a new comforter set isn’t in the budget, try switching out some throw pillows or new sheets.

In your kitchen, maybe new curtains will do the trick. If a total kitchen makeover isn’t possible, replacing just a few items such as the seat cushions, dish towels, pot holders, glassware, plates, canister sets or a table centerpiece can make all the difference.

For a bathroom-specific makeover, whether or not it succeeds or fails will likely come down to one item; color. The warmer the better because let’s face it… on some mornings, it’s cold enough without feeling as if you’re walking into a freezer.

When it comes to color, it’s better to use a warm color instead of a cold color in a bathroom, especially one with compact fluorescent lighting which is cooler and makes you look paler.

Colors such as sage green or warm browns work best. Use paint though, because wallpaper, especially in a smaller bath, may be tough to pull off. You should go with a neutral in warm tones rather than a busy pattern like floral if you do choose to go that route, however. Busy patterns are much too intense, especially early in the morning.

Keep in mind though, you should take stock of your lighting and other elements of the bath first and foremost. Once you have your cabinets, countertop and flooring, then put the color on the wall because the color you choose can change the look of everything you’ve done. Skylights or window tinting can make paint look more gray or brown.

Don’t forget that skylights or window tinting can make paint look more gray or brown. Before diving in, put a sample of the color you’re considering on all the walls, not just one and look at it at varying times of the day and even at night to make sure you like the color and it works with the room’s other elements.

Image

For more information, visit www.BillMcCormick.com